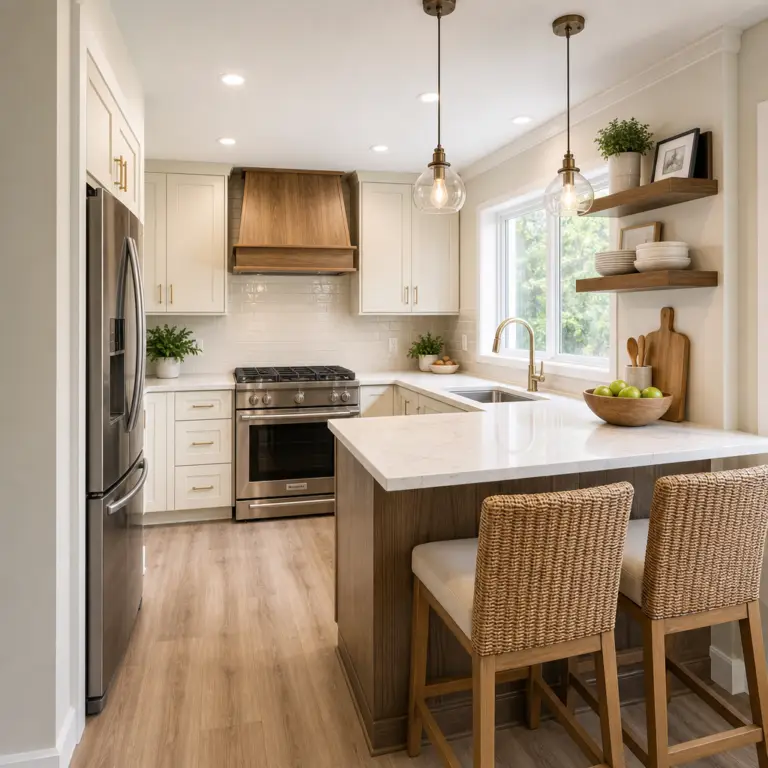
Remodeling your kitchen is more than just a home improvement project—it’s a chance to transform the heart of your home into a space that reflects your style, meets your needs, and elevates your daily life. To effectively remodel a kitchen, it helps to start with a clear vision. But where do you even begin?

A kitchen remodeling project in Virginia is a transformative process that combines creativity, planning, and practical execution. To successfully remodel a kitchen, it can elevate your home’s aesthetic appeal, improve functionality, and increase its value.
How to Effectively Remodel a Kitchen
However, the kitchen remodel process can feel overwhelming. That’s why we’ve crafted this comprehensive guide to walk you through every essential step to remodel a kitchen, offering tips and expert insights to make your dream kitchen a reality.
Key Takeaways
- A kitchen remodel requires careful planning, budgeting, and professional execution.
- Focus on functionality, storage, and aesthetics for a timeless and practical design.
- Partnering with experienced professionals like Elite Contractors Services ensures a smooth remodeling process.
Create the perfect kitchen for your home.
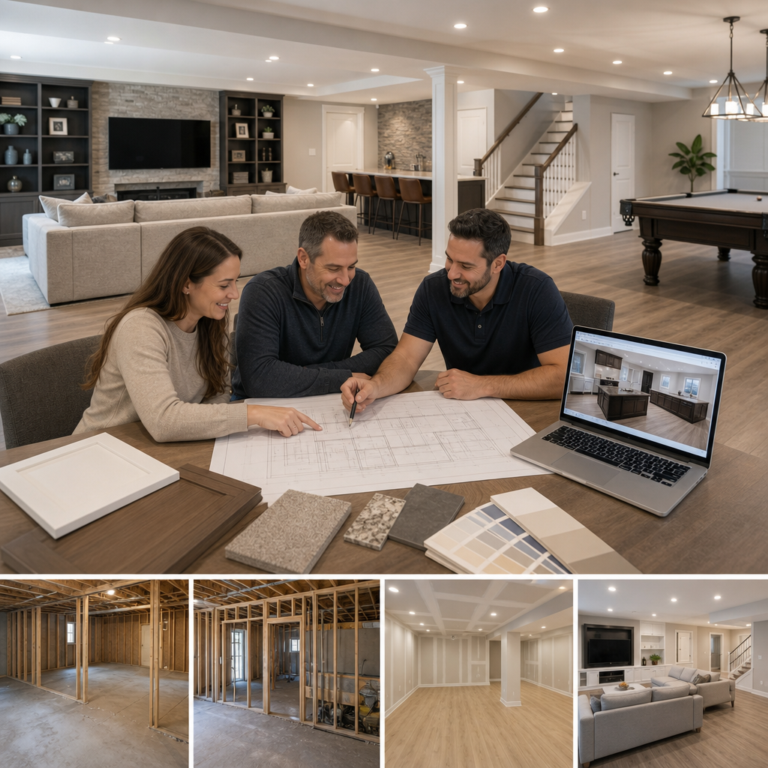
Step 1: Planning Your Dream Kitchen
This stage is all about assessing your needs, exploring your vision, and laying the foundation for your project.
Define Your Needs and Wishes
Before tearing down walls or picking out countertops, take time to reflect on your current kitchen setup.
- Identify problems. What’s not working? Is it the lack of counter space, outdated appliances, or inefficient layout? Make a list of your pain points, such as lack of storage, poor lighting, or outdated appliances.
- Prioritize needs vs. wants. While you might want a professional-grade stove, your budget might only allow for mid-range appliances. Focus on functionality first.
- Research inspiration. Browse magazines, online platforms like Pinterest, and home improvement websites for kitchen remodel ideas that resonate with you. Tailor the design to your household’s needs—whether it’s for a single cook, a large family, or frequent entertainers.
- Think about functionality. Consider how you use your kitchen. Do you cook frequently, entertain often, or need child-friendly features?
- Hire an expert. A professional interior designer can streamline the planning process, offering expertise and innovative ideas to maximize your space.
Pro Tip: Create a list of must-haves and nice-to-haves to prioritize your needs.
Assess Your Budget for a Major Kitchen Remodel
Setting a realistic budget helps avoid surprises and ensures you achieve your goals without financial strain.
Determine Your Spending Limits
- Assess your finances. Determine how much you can allocate to the project without compromising your financial stability.
- Understand cost averages. The kitchen remodel cost can vary widely depending on size, materials, and labor. In the U.S., a minor kitchen remodel ranges from $27,000 to $30,000, with major upscale projects exceeding $160,000. Explore price ranges for cabinets, countertops, appliances, and flooring to understand where your money will go.
- Break down costs. Allocate funds to key areas like cabinets, appliances, countertops, and labor. Don’t forget permits and inspection fees.
- Look for savings. Repurposing materials, DIY projects, or selecting cost-effective options can reduce expenses. For example, choosing stock cabinets over custom ones can save thousands.
- Plan for contingencies. Set aside 10-20% of your budget for any unforeseen expense, such as hidden water damage or supply chain delays.
Step 2: Designing Your Kitchen
This is the time to finalize layouts, select materials, and determine how your kitchen will look and function.
Basic Kitchen Plans
A well-designed layout can make or break your kitchen’s usability.
- Explore layouts. Popular designs include L-shaped, U-shaped, and galley kitchens. Choose one that fits your space and lifestyle.
- Optimize the work triangle. The sink, stove, and refrigerator should form an efficient triangle for a smooth workflow.
- Consider traffic flow. Ensure there’s enough space for multiple people to move around comfortably.
- Visualize your ideas. Use online tools or work with a design-build firm to create a detailed floor plan. At Elite Contractors Services, we use 3D renderings to visualize your new kitchen.
Choose the Right Type of Kitchen Cabinets
Cabinets play a major role in your kitchen’s aesthetics and functionality.
- Explore your options. Decide between custom, semi-custom, or stock cabinets based on your budget and needs.
- Material and finish. Wood, laminate, and MDF are popular materials. Choose finishes that match your style, whether it’s sleek and modern or warm and traditional.
- Think functionality. Look for features like soft-close drawers, pull-out shelves, and built-in organizers. Incorporate smart storage solutions like corner cabinets and pantry systems.
Step 3: Get Ready for the Kitchen Redesign
Prepare your home and family for the changes ahead. Here’s how to get everything ready before the construction begins:
Clear the space
The first step is to declutter and empty the kitchen. Remove all items from cabinets, drawers, and countertops. Pack fragile items like glassware and dishes carefully and store them in a safe location. For frequently used items, keep a small, accessible box of essentials handy.
By clearing the space, you give contractors full access and protect your belongings from potential damage or debris.
Protect valuables
A kitchen remodel can be messy, with dust, debris, and potential mishaps affecting adjacent areas. Safeguard your home by covering floors, walls, and nearby furniture with protective materials like drop cloths, cardboard, or plastic sheets.
If valuable items or furniture are near the construction zone, consider moving them to another part of the house to prevent accidental damage.
Control dust
Dust is an inevitable byproduct of remodeling, but proactive measures can help contain it. Use plastic sheeting to seal off the kitchen from other areas of the house, paying special attention to doorways and vents. If possible, invest in zippered plastic barriers for easy access while keeping dust contained.
Additionally, ask your contractor if they’ll use dust control measures like air scrubbers or temporary ventilation systems.
Set up a temporary kitchen
Without access to your primary kitchen, you’ll need a makeshift space to prepare meals and maintain a sense of normalcy.
Choose a corner of your home, such as a dining room or basement. Then, equip it with basic appliances like a microwave, toaster oven, electric kettle, and mini fridge. Stock the area with essential utensils, disposable plates, and cups to make meal prep and cleanup more manageable.
If space allows, include a small folding table or cart for extra workspace.
Plan meals in advance
Cooking during a remodel can be challenging, so planning ahead will help reduce stress. Stock up on easy-to-prepare meals like frozen dinners, canned soups, and pre-cooked options.
You may also take advantage of meal delivery services or explore local takeout options to save time and energy. If you enjoy cooking, prepare and freeze meals in advance for quick reheating. By planning your meals, you’ll avoid the added frustration of figuring out food logistics amid the chaos.

Step 4: Demolition and Construction
Once the groundwork is laid, it’s time to move on to the demolition and structural build-out phases.
Demolition and structural build-out
This initial step clears the way for the new design, creating a blank canvas for your kitchen transformation. Proper execution here ensures a smoother construction process.
Start safely
Before any demolition begins, turn off all utilities connected to the kitchen, including electricity, gas, and water. This precaution prevents accidents and protects your home from hazards like gas leaks or electrical shocks.
Hiring experienced professionals is highly recommended for this stage. They’ll have the tools and expertise to safely and efficiently manage the demolition process.
Remove elements in order
Tearing out kitchen elements in the right sequence minimizes damage and maintains organization. Typically, removal starts with fixtures and appliances, followed by cabinets, countertops, and finally, flooring.
Systematic removal ensures the structural integrity of your home remains intact during the process.
Structural updates
Once the old kitchen is stripped down, this is the ideal time to address any underlying structural concerns. Inspect and, if necessary, reinforce framing, repair or replace insulation, and address issues with load-bearing walls. These updates provide a sturdy foundation for your new kitchen and can also improve energy efficiency.
Waste management
Arrange for debris removal ahead of time. Whether it’s renting a dumpster or using a hauling service, plan how to dispose of old materials responsibly. Consider donating usable items, like cabinets or fixtures, to organizations like Habitat for Humanity.
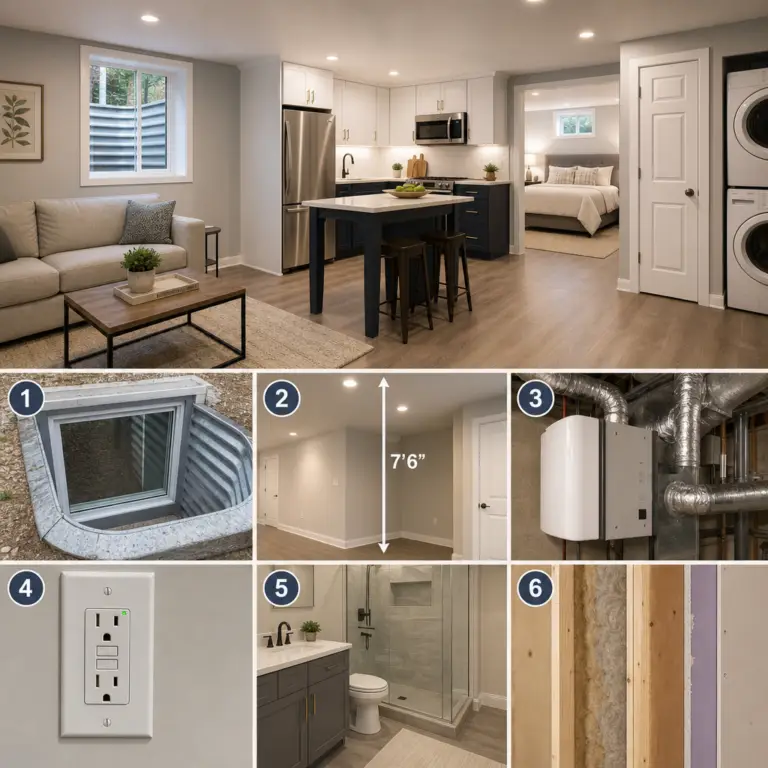
Plumbing, Wiring, and HVAC Rough-In
Once demolition and structural updates are complete, the focus shifts to the behind-the-scenes systems that are essential for a functional and safe kitchen. These critical components must be installed with precision and care.
Plumbing
Work with a licensed plumber to install or reroute water and gas lines to accommodate sinks, dishwashers, refrigerators, and stoves. Now is also the time to address upgrades, such as installing a pot filler over the stove or adding a water filtration system.
Electrical work
Modern kitchens demand robust electrical systems to support appliances, lighting, and convenience outlets.
A licensed electrician can upgrade circuits, add GFCI (Ground Fault Circuit Interrupter) outlets for safety, and install dedicated lines for high-power appliances like ovens and microwaves. Consider incorporating under-cabinet lighting, pendant fixtures, and dimmer switches to enhance functionality and ambiance.
HVAC systems
Proper ventilation is critical, especially for kitchens with gas stoves. Ensure that range hoods are vented to the outside to prevent the buildup of smoke, grease, and odors. If your kitchen remodel includes significant changes to the layout, adjust HVAC ducts to maintain efficient airflow.
Meet code requirements
All plumbing, wiring, and HVAC work must comply with local building codes. Failure to adhere to these relevant regulations can lead to safety hazards, fines, or delays in obtaining permits. Working with licensed professionals ensures compliance and quality workmanship.
Other Relevant Considerations
During demolition and construction, here are additional details to keep in mind:
- With walls and floors exposed, take advantage of the opportunity to inspect for hidden issues like mold, pests, or outdated wiring. Addressing these problems now can save you time and money in the long run.
- Uneven floors can affect cabinet and appliance installation. Have your contractor assess and level the subfloor to create a stable foundation for your new flooring.
- If your kitchen shares walls with bedrooms or living spaces, consider adding soundproofing insulation to minimize noise from appliances and cooking activities.
- Plan for future needs by installing extra outlets or wiring for smart home devices, like voice-controlled lighting or smart refrigerators. This foresight ensures your kitchen remains functional and up-to-date for years to come.
Start your journey to a dream kitchen.
Step 5: Finishing Touches
With the heavy lifting done, it’s time to add the final touches and bring your kitchen to life.
Install Cabinets, Countertops, and Flooring
These elements define your kitchen’s style and usability.
- Cabinets: Install them first, ensuring they’re level and secure.
- Countertops: Popular options include granite, quartz, and butcher block. Measure carefully for a perfect fit.
- Flooring: Choose durable and water-resistant materials like tile, hardwood, or luxury vinyl.
Install Appliances, Plumbing, and Electrical Wiring Fixtures
With the foundation in place, it’s time to integrate the functional components.
- Bring in major appliances like stoves, refrigerators, and dishwashers.
- Install sinks, faucets, and lighting. Opt for energy-efficient models where possible.
- Ensure all connections are secure and appliances function correctly.
Step 6: Final Inspection and Completion
The final phase of your kitchen remodel is all about ensuring every detail meets your expectations, and everything functions as it should. After weeks or even months of planning, demolition, and construction, this is your opportunity to confirm that your vision has come to life and that the space is ready for use. Here’s how to approach this critical stage:
Inspect the Work Done
A thorough inspection ensures that the remodeling process concludes on a high note. Here’s what to focus on during this step:
Detailed walkthrough
Conduct a meticulous walkthrough of the kitchen with your contractor. Pay close attention to every element, including cabinetry, countertops, flooring, and finishes. Look for defects such as scratches, chips, misaligned fixtures, uneven grout, or poor paintwork. Ensure that all design details, like trim and hardware, have been completed according to the plan.
Test everything
Take the time to test new appliances, fixtures, and systems.
- Turn on faucets and check for leaks or inconsistent water pressure.
- Run the dishwasher and garbage disposal to confirm they’re working correctly.
- For electrical systems, test all light fixtures, outlets, and switches.
- Ensure that range hoods, ventilation systems, and HVAC components are fully operational.
- Appliances should run smoothly without unusual noises or vibrations.
Inspect sealing and caulking
Check the areas around sinks, countertops, and backsplashes for proper sealing. Well-done caulking prevents water damage and adds a polished look.
Check measurements and alignment
Confirm that cabinets, countertops, and appliances align perfectly and fit within the designated spaces. Verify that cabinet doors and drawers open and close smoothly, with no sticking or misalignment.
Punch List Creation
The “punch list” is a document outlining any remaining tasks, defects, or adjustments needed to finalize the remodel. Here’s how to manage it:
Document issues
As you inspect, take detailed notes and photos of any issues or areas needing attention. Common punch list items include touch-up painting, tightening loose hardware, adjusting cabinet hinges, or replacing scratched surfaces.
Communicate with your contractor
Share your punch list with your professional contractor or project manager and discuss a timeline for completing the outstanding tasks. At Elite Contractors Services, we will address these issues promptly to ensure your satisfaction.
Verify completion
Once all the punch list items are addressed, conduct a follow-up walkthrough to verify that all corrections have been made to your satisfaction.
Step 7: Enjoy Your Newly Remodeled Kitchen

Celebrate your achievement by making the most of your updated space.
- Host a gathering. Show off your new kitchen with friends and family.
- Capture the moment. Take photos of your remodel for inspiration and memories.
- Maintain your investment. Regular cleaning will keep your new kitchen looking and functioning like new.
Conclusion
Remodeling your kitchen in Virginia is a journey that requires thoughtful planning, skilled execution, and an eye for detail. Follow these steps to create a kitchen that combines beauty and functionality perfectly tailored to your lifestyle.
Ready to get started? Partner with experienced professionals like Elite Contractors Services to turn your dream kitchen into a stunning reality.